Minutes - Building the History Page
In the last two posts [1, 2], I had described the app I want for personal tracking and my progress on the app. I have to create five tabs: History, Dashboard, Tracker, People, and Settings. I have finished designing the Settings page. The Tracker page is in the making. Today, I am going to talk about the design of the History page.
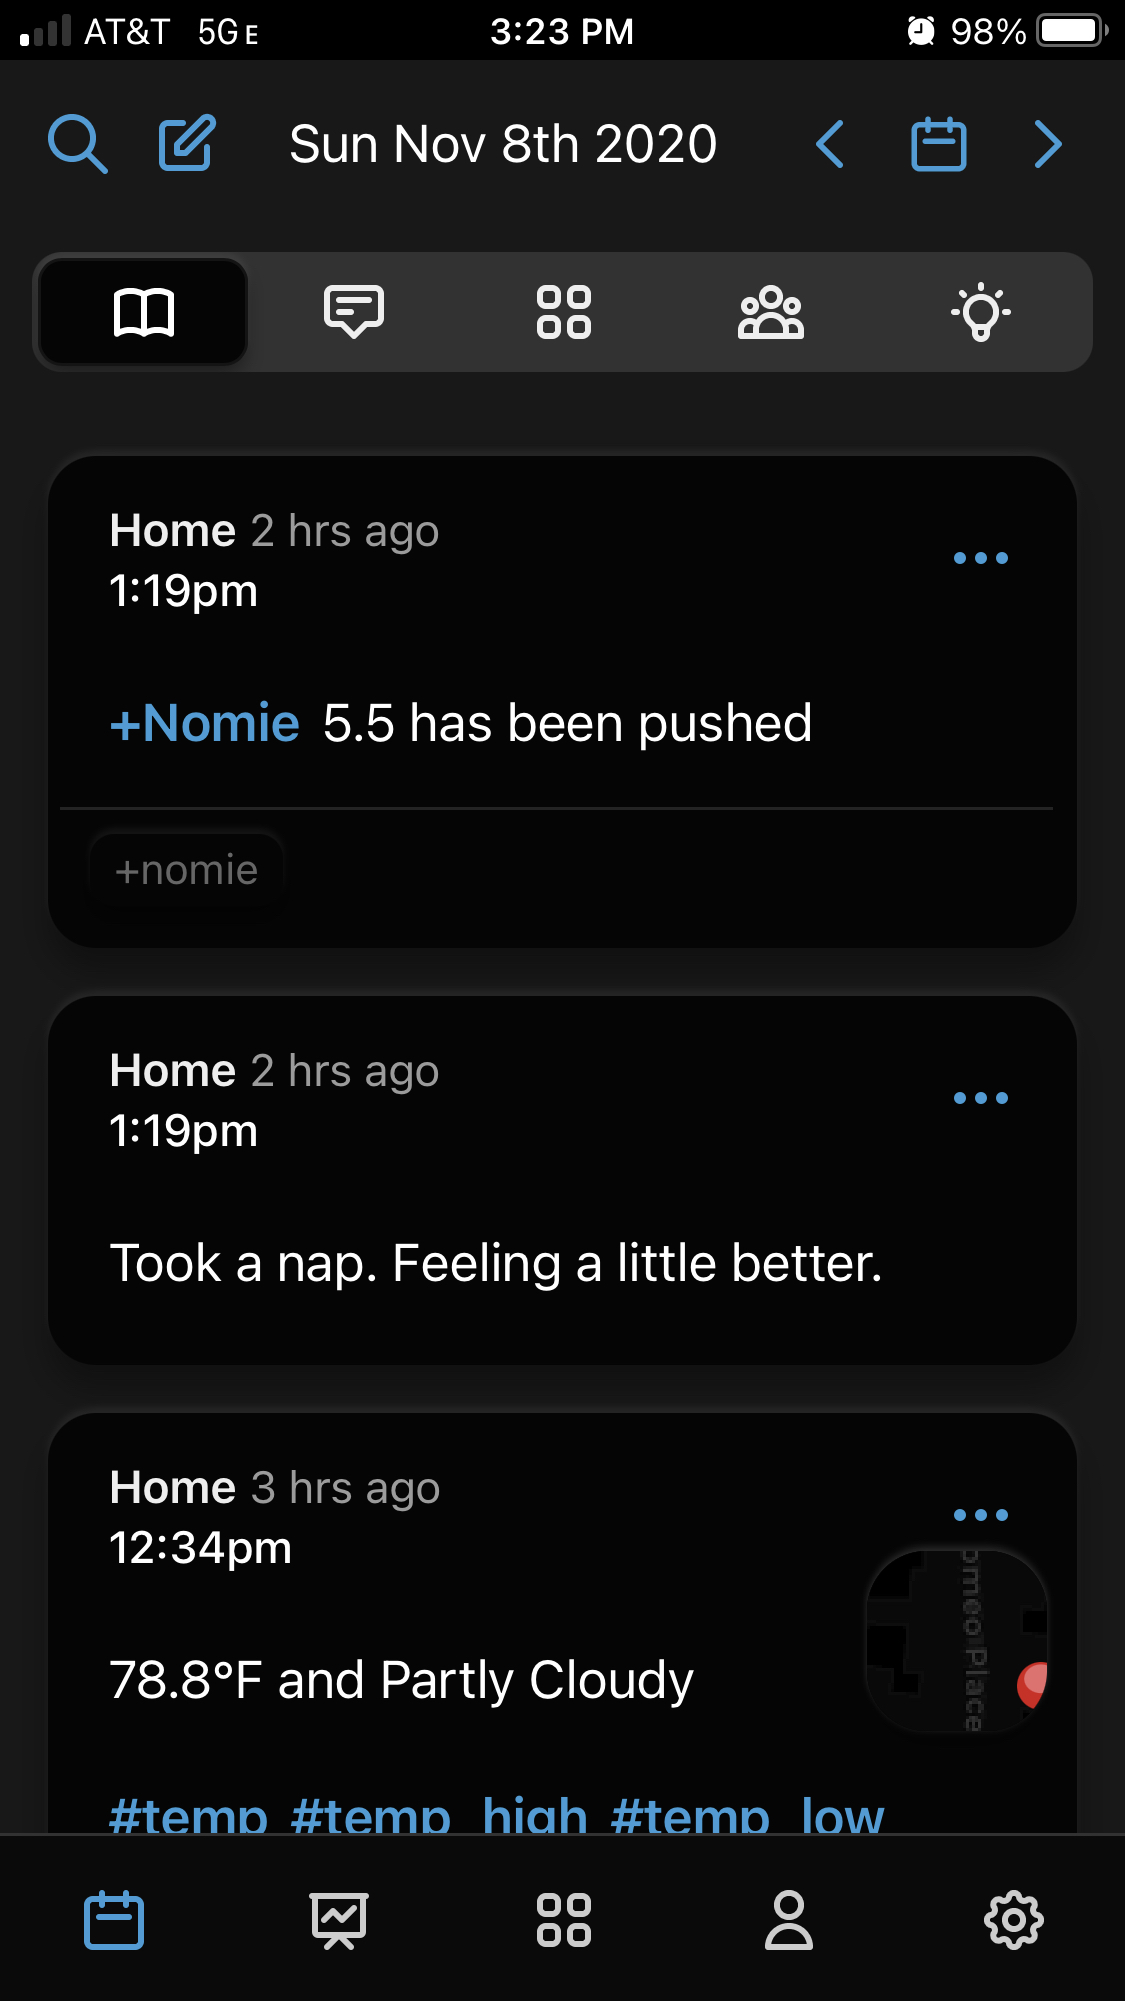
Minutes - History Page
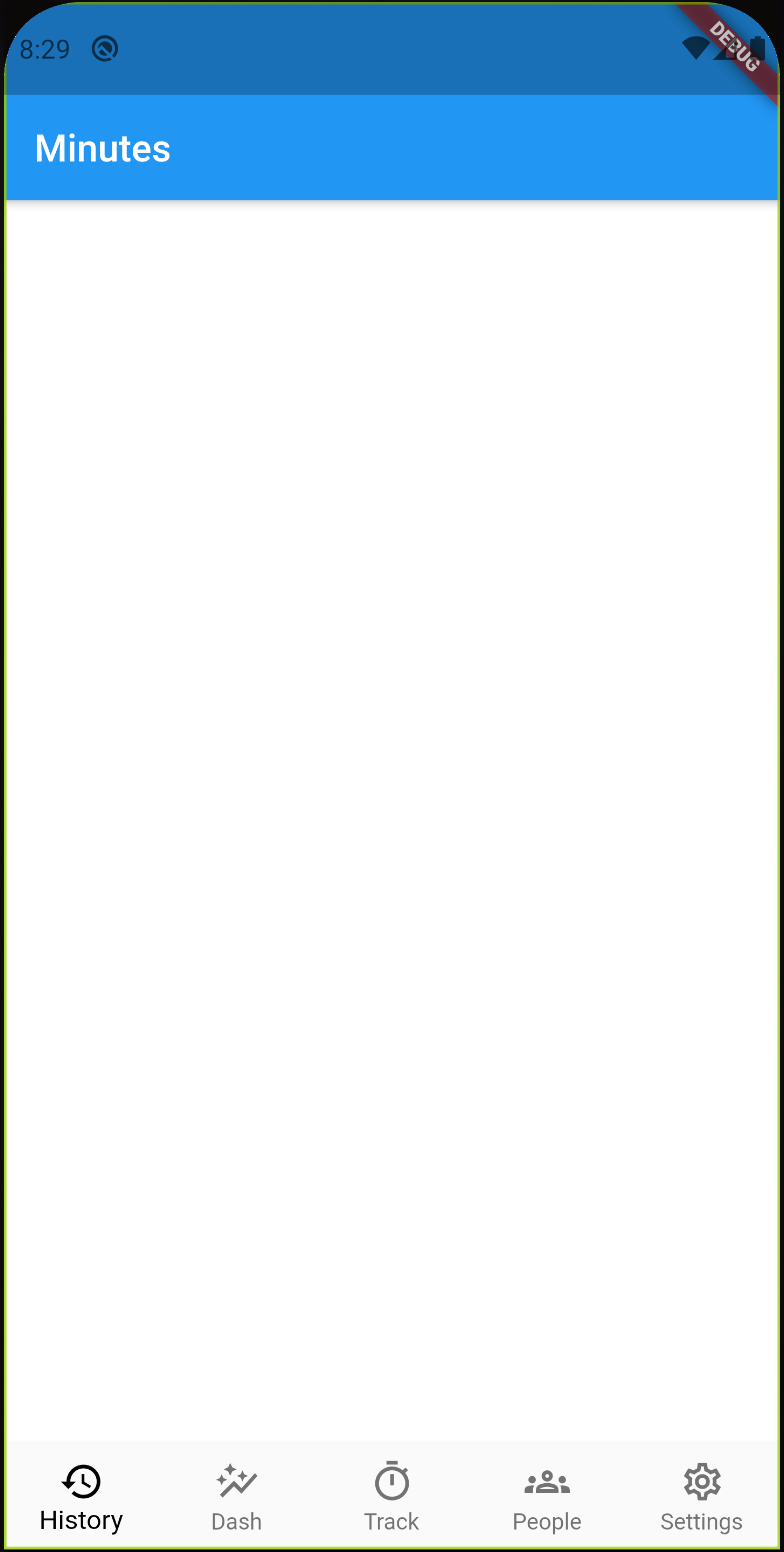
I had to build up the above blank screen to something similar to Nomie’s History page.
Now, I have just started using Flutter and Dart for Minutes. Naturally, I did not know how to build the History page. Since I was not as lucky as I was during the Settings screen creation, I had to work with the online tutorials and build it from scratch. The History page is a list of logs in reverse chronological order. I call each of the log a Record Card.
Record Card Particulars
It is good to list down the broad data points that each Record card should show:
- The amount of time that has passed from now
- Creation timestamp
- Settings for tracker record data - edit, copy, delete, share.
- Details of the Tracker - emoji, name, value.
- Note added to the log.
- People mentioned in the log.
- Context added to the log note. Context is something that adds metadata labels to the records. Think of it like hashtags.
Nomie’s record card inspired all of these points. I’ll discuss them in detail in the Anatomy section.
The following section talks about layouts in Flutter. Feel free to skip to the anatomy section.
Flutter Layout Concepts
I had to understand all the below topics to build my Record card.
ListTile vs Card
I found many tutorials that used ListTile instead of a Card to build a card type widget. The ListTile classmight have complicated the card design, so I selected the Card class. Besides, the Card class is specifically there to build a card. I also found a few good articles [1, 2] to help me create the card.
Column + Row Combo is all you Need
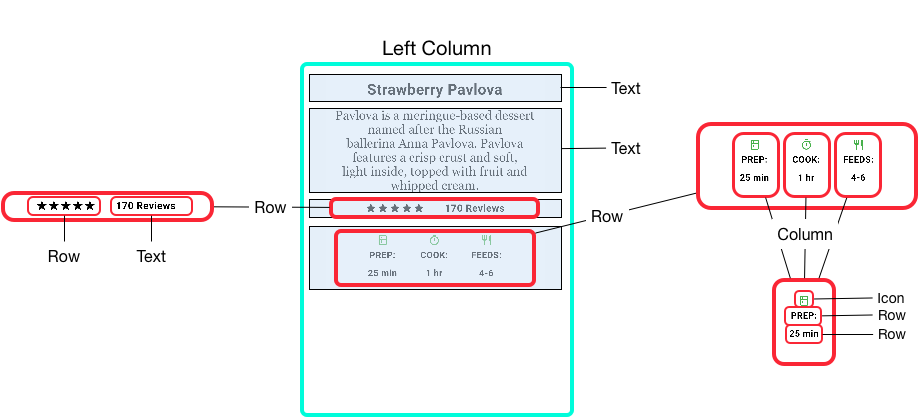
A Card is a rectangular box having a child widget with the complete card layout. And the card layout is built by Column and Row classes. All the child widgets in a Column are displayed vertically, top to bottom. This order reverses in a Row from left to right. With a combination of these two classes, you can build any complex layout. Here is such an example from Flutter’s documentation on Layouts.

The outer red box is a Row widget that contains a Column (green rectangle) and an image widget. In the image below, this green Column widget becomes a vertical array of two Text and two Row widgets. The two inner Row widgets break into more Row and Column widgets.
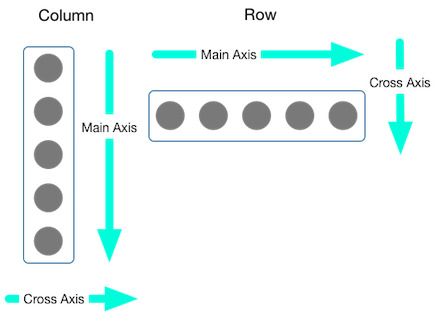
Main & Cross Axes
The Row and Column widgets also bring the Main and Cross axes. These axes are convenient ways of aligning child widgets. Even after reading their description from the documentation, I couldn’t figure out their usage. The following figure from Flutter’s documentation on Layouts explains how they align depending on the widget.
Anatomy of the Record Card
I will mark the Record card for every Row and Column block used. I will also go into detail about the displayed information and the code.
Record Card Layout
The Record card has multiple folds of Row and Column widgets. The card itself is a Column widget that contains more blocks.
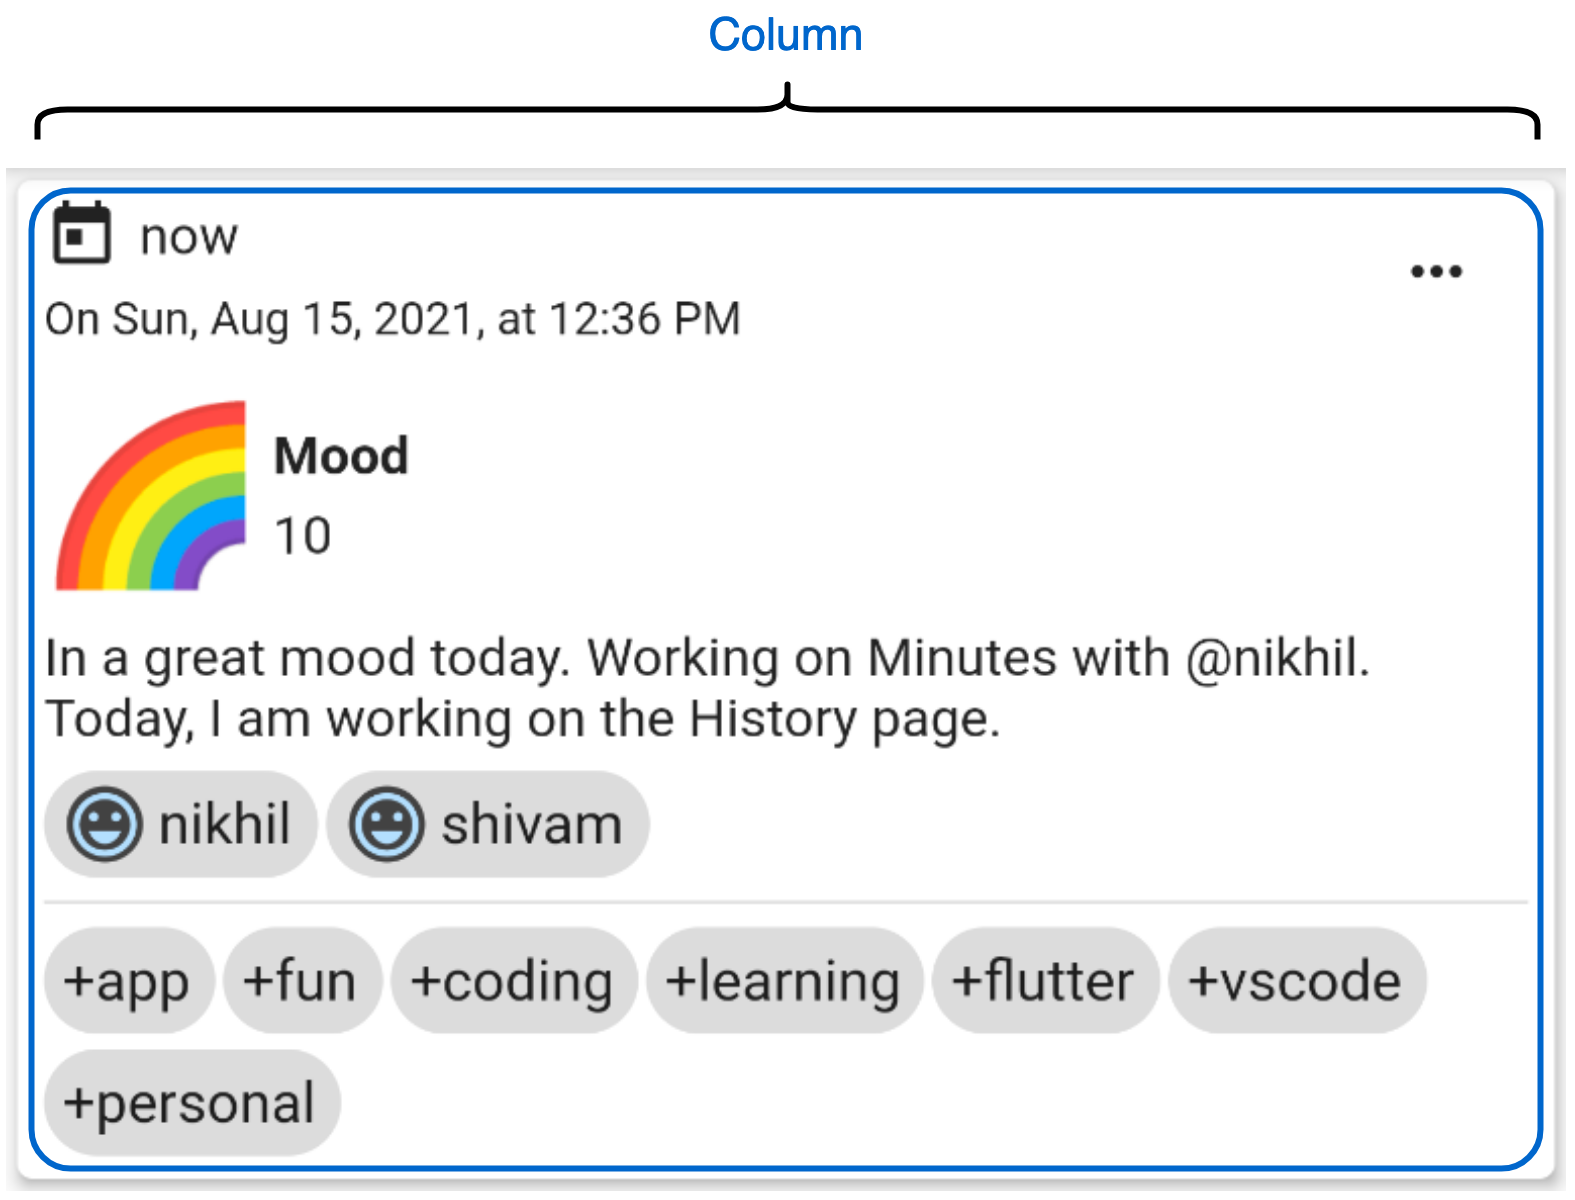
This Column widget contains five individual Row widgets stacked vertically as below.
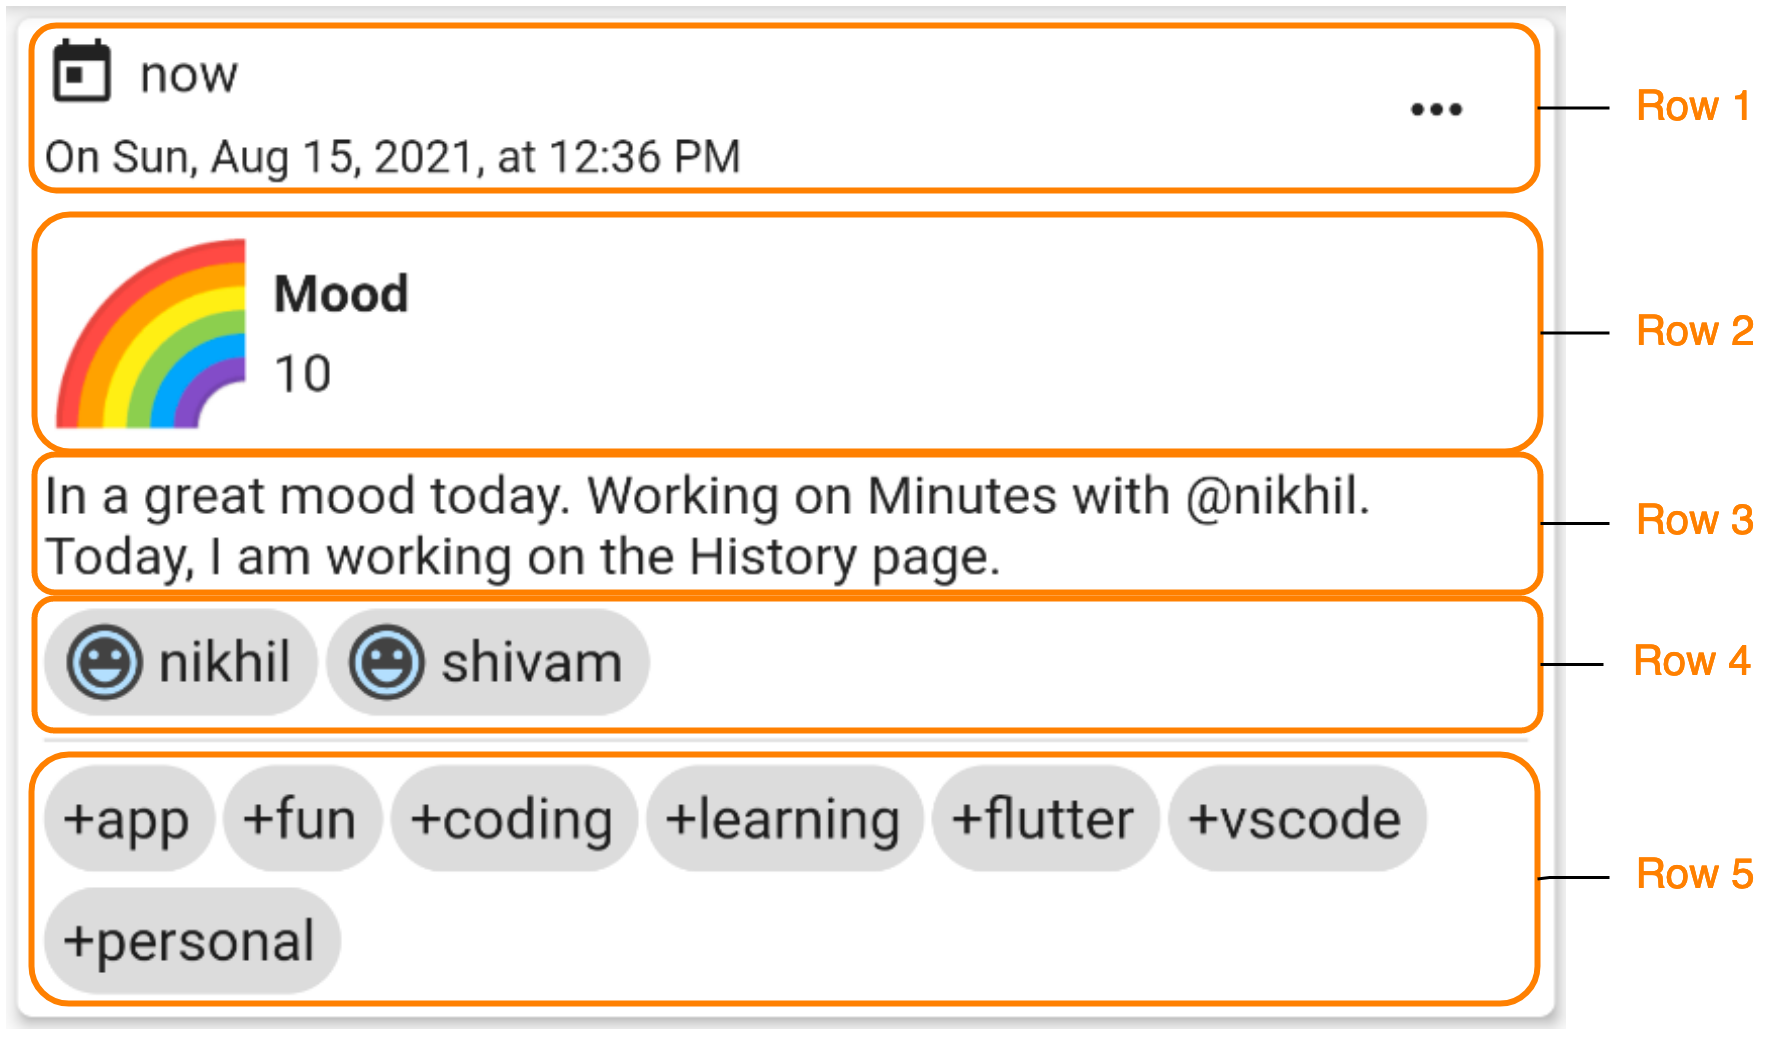
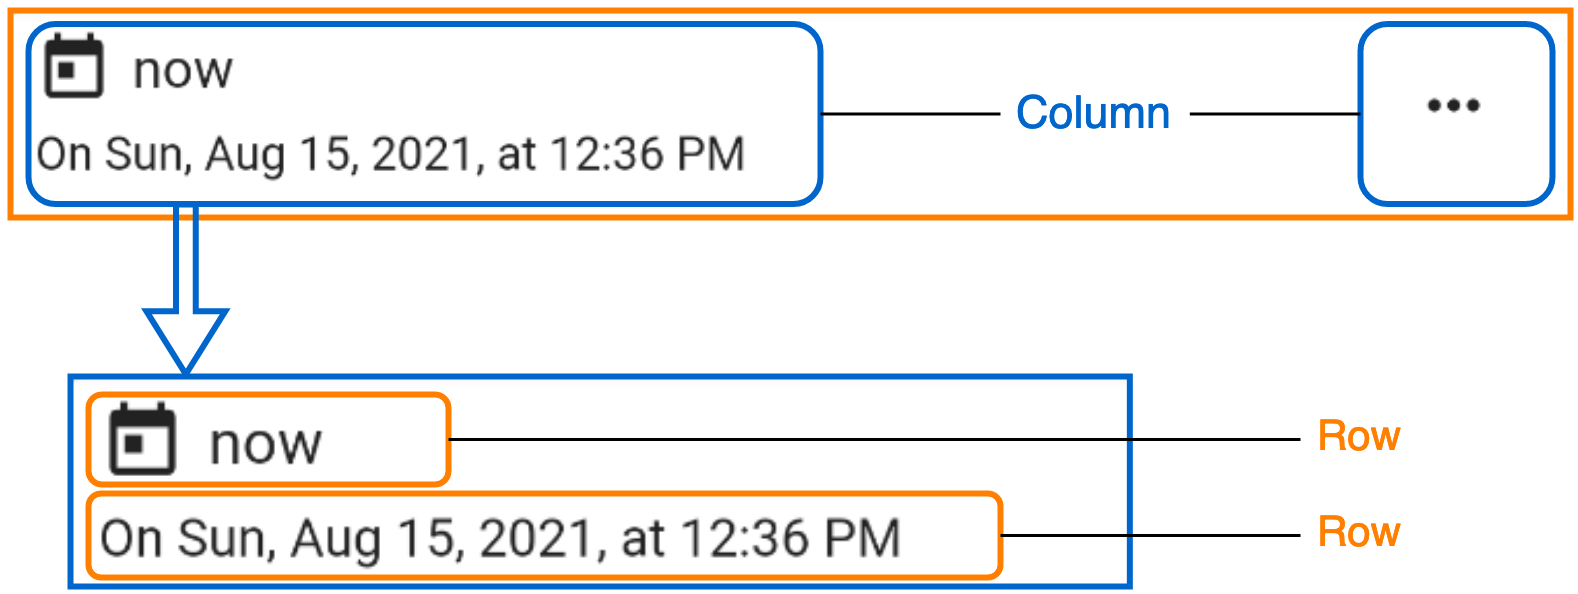
The Row widgets from 3 to 5 are simple, non-divisible widgets. The following figure shows the breakage of Row 1 into a Column that further contains two Row widgets.
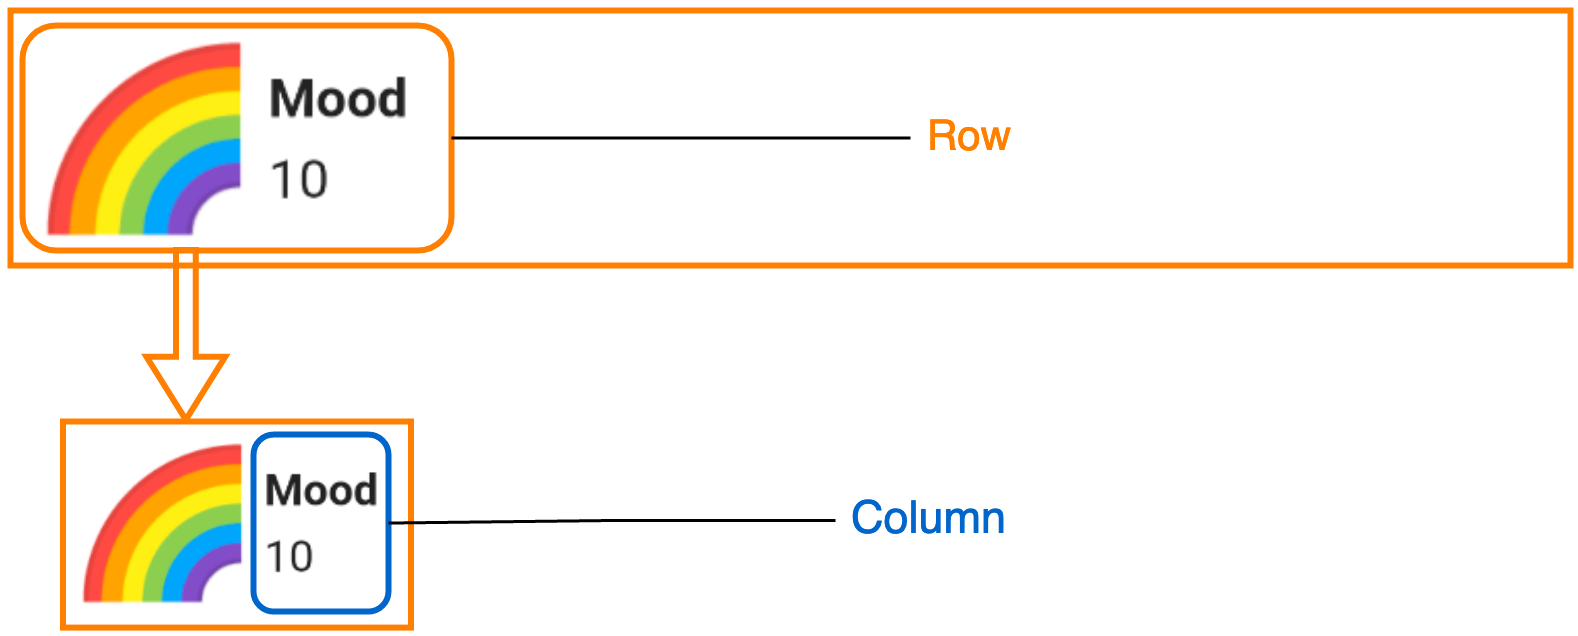
And Row 2 contains an inner Row that has a single Column.
The blank space after the first Row is for other elements that might come later. I did not want to centre or stretch the card details over the whole Row.
Record Card Particulars - Detailed
Timestamp and Settings popup

The first goal was to have the time passed string like - now, 3 hours ago, 1 day ago, 2 months ago, etc. - from the log creation time. Instead of writing multiple conditional statements, I used the Flutter package called timeago. It gave me precisely the functionality I wanted. Just put in the DateTime object, and it will return the formatted string.
timeago.format(endTime);
The second goal was to display the timestamp. I had to account for two types of Trackers: Counter and Timer. The Counter will have a creation time, and the Timer will have both the start and the end times.
The third objective was to have the three horizontal dots settings popup for each card. The popup menu was easy to create using the PopupMenuButton class. I read various articles [1, 2, 3, 4] to design and position the popup menu on clicking. By default, the PopupMenuButton gives you three vertical dots. Rotating the dots by 90 degrees did not work well. Then I found the icon parameter in the PopupMenuButton class and used the More Horiz icon. Following is the corresponding code:
PopupMenuButton(
    icon: Icon(Icons.more_horiz),
    iconSize: 20,
    itemBuilder: PopupMenu,
);
Mini Tracker Widget

The mini Tracker widget shows the information about the Tracker used to create the tracking log. Each tracker has an emoji and a name. And the log also saves the value of the tracker. For example, in the Record shown above, the mini Tracker’s name is Mood tracker has a Rainbow emoji. And its value in this particular entry was 10 (on a 10-point scale).
The row looks empty because I will have plans to add more information to it once the Minutes’ Tracker page is complete.
Record Note

It is a simple Text widget created to display the note added to the record entry. The names when mentioned using @ should hyperlink to that person’s details. I will add this feature later.
People mentioned in the Record

In the record note, you can add people using the @ prefix. These people will be extracted and saved for later stats. I wanted to highlight the people mentioned in the note.
The Flutter term for the widget displaying each person in the above screenshot is a chip. There are multiple kinds of chips. For the clickable functionality, I used the ActionChip class. This medium article has a good explanation of the chips.
I faced some hiccups in spacing, padding and wrapping of the chip widgets. The linked SO answer showed me how to use padding and labelPadding parameters. I also used the visualDensity parameter. In hindsight, I should have read the documentation first.
I also had to handle the wrapping of the chips to the new line. The Wrap class class exactly does that. The Wrap was not playing well with the Row class. So this answer suggested eliminating the Row class. And the padding between multiline chips was handled using the runSpacing and spacing parameters of the Wrap class. Here is how my code looks:
Wrap(
    runSpacing: -8,
    spacing: 2.0,
    children: List.generate(people.length, (index) {
        return PersonChip(person: people[index]);
    }),
);
Contexts mentioned in the Record

Identical to the last section, I used Wrap to show multiline context chips using all the required padding and spacing parameters.
Other Elements
I used SizedBox class to add blank space between different layout elements. It can add space in both vertical, as well as, horizontal directions.
The Divider class came in handy to add the horizontal line between the last two sections. There are, of course, a host of options available for dividers.
The last thing was to make my card tappable. I wanted to make each record card interactive. Currently, it is just the ripple effect on each tap, but I have thought of opening the record log editing window. I learned that I had to wrap my card widget inside a clickable widget. I had a few options available, out of which I chose the InkWell class.
History Tab
I used the ListView class to display all the Records cards vertically in the History tab.
Lessons Learned
While coding and debugging the errors, I learned many new things.
Flutter/Dart Syntax
Many were syntax related. For example, I need to use x.runtimeType to print the data type of a variable. I also observed the similarity between the if-else conditional statements in Dart and C programming language. The wiki page says that Dart has C-style syntax.
Variable Declaration
Another learning was the difference between the keywords like var, final, and const for declaring a variable. If you explicitly assign a datatype (String, int, List, etc.) to a variable, it becomes static. That means that you can not update its type throughout the runtime. If you do not know the data type beforehand, then you use the var keyword. This way you can assign any data type to the variable throughout the code runtime, just like you can in Python. This variable will be called dynamic. The final keyword indicates that the data type of the variable will not change now. Finally, the const keyword makes the variable immutable. [ref: SO]
DateTime in Flutter
Learning how to manipulate the DateTime class objects in Flutter was also fun. There was no in-built method to convert DateTime variables into formatted strings. I had to install and import the intl package. This package gave me the DateFormat class that had a lot of formatting options available. Python has this whole formatting thing included in the core datetime class.
There was a moment while creating the card where I was puzzled by what was happening. I wanted to display the formatted timestamp on the card, but the timezone was getting mixed up. At some places it was IST, and at the other, it was UTC. To have the same timezone, I went down the timezone rabbit hole. There is no direct support of timezones in Flutter/Dart. But there is a timezones package by Google, but its usage included adding the timezone database as an asset in your app. I wanted to avoid that. I realized that the IST dates already have the timezone info. That means that I have missed giving that information to the remaining dates. Long debugging story short, I had to tell all the DateTime objects to use .toLocal() to pick the timezone information from my device.
Hot Reloading
While building the app, I use hot reloading to see the effects of my changes. There were two issues I have started facing regarding hot reloading. Intermittently, it stops refreshing. First, I try restarting the debug session. If that does not solve the problem, I wipe clean my Android Emulator data and Cold Reboot it.
There was a moment when hot reloading took a lot of time to refresh. The usual time of under 1 second increased to 7 seconds. Running flutter clean solved the problem then, but I am not sure if it is the solution.
Code Organization
The History tab has lead to the creation of a lot of files in my directory. I could not decide between the two possibilities of the code arrangement. There were a lot of articles on this topic. The one blog post I read gave me some clarity, but I will need to read more about it.
Conclusion
The History tab and the Record card for this tab was a decently large task to keep me busy during the weekend. It taught me a lot, and I am satisfied with the final results.
To make the cards look better, I will need to look into card themes once the Minutes v1 is in place. The next post is going to be about either the Tracker or the People screen.